Mockups for Art & Frame Stores
Step by step
Open the PSD file in Photoshop.
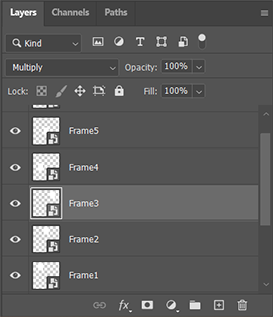
In the Layers panel (bottom right), find the frame layer you want to edit, then double-click the
thumbnail icon to open the smart object.
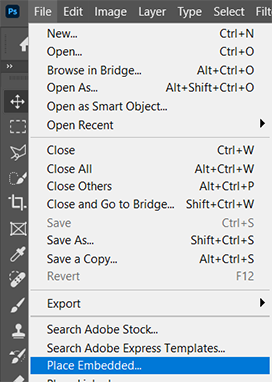
After double-clicking the layer icon, a new tab will open with the smart object. Go to File > Place Embedded, then choose your image to insert it into the mockup.
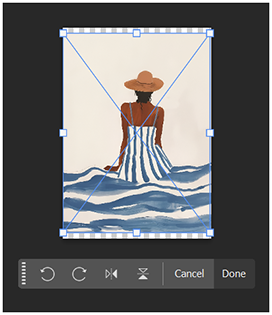
If your image doesn’t fit the mockup perfectly, you can easily resize it. Just hover over one of the corners until you see the resize cursor. Click and drag to adjust the size. To keep the aspect ratio, hold Shift while dragging. Once you're happy with the placement and size, press Ctrl+S (or Command+S on Mac) to save, then close the smart object tab. Your image will automatically appear in the main mockup.
If you have more art to add, simply repeat steps 1,
2, and 3 for each frame.
When you’ve placed all your artworks (some mockups include multiple frames), you’re ready
for the final step.
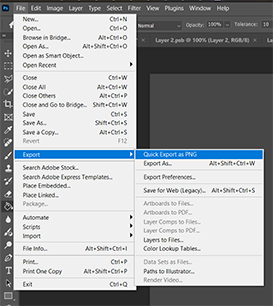
Go to File > Export > Quick Export As PNG and select where you want to save the final result.
Your final mockup is now ready to showcase your art beautifully!